The email is the communication medium that will allow you to offer a personalized experience to your customers. What differentiates PUBLITRAC from the other email platforms, and what makes it powerful, are its three levels of customization that can be inserted in an email: customization at the level of the recipient of the email thanks to the tags; customization at the level of the sender of the email via the sender address and the special links; and customization at the level of the dynamic content (applies only to the email).
Create a new email
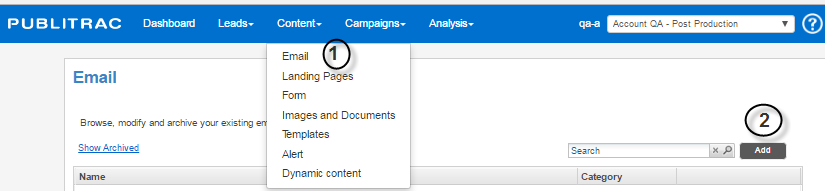
1. Select Content then Email.
2. Click Add.
The screen below appears.

3. Type the Name* that you want to give to your email (this is the name under which your email will be saved in PUBLITRAC).
4. Add a Description, if you wish (this is the description that will appear next to the email that you have saved).
5. Select one of the suggested Templates*. Note: you can also download your own template.
6. Preview the selected template in the Preview window on the right.
7. Click Next.
The screen below appears.
...

8. The description that is displayed will be the one that you have saved in the previous step.
9. Enter the Subject* ofyour email (this will be the Title that will appear in the subject of the email that you send to your leads).
10. Enter or select category tags from the drop-down menu. A category tag is used to group your lists by themes (for example, contest list,
...
congress list,...). The category tags that appear in the drop-down menu are the ones you have previously created manually (the category tags that have been created remain in memory and are displayed in the drop-down menu). This field is optional. If the desired category tag does not exist, you can create it manually by entering the name of the category you want in the drop-down menu field. No category tag is pre-created by default in PUBLITRAC.
Customize your email at the level of the Name and Address of the sender
11. Enter the Name of the sender (do not enter the email address)* : it is the name of the person who the email will come from. This name will appear in the Inbox of the leads who will receive the email.
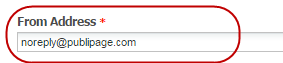
12. Enter the Address* of the sender: it is the email address of the sender as it will appear in the Inbox of the leads who will receive the email. This is also the address to which the replies will be sent.
...
If you do not wish to receive a response on the part of your contacts, enterno-reply@votredomaine.com
...
If you want to send it from a sales representative, click on Advanced Options (or on
...
 ) and select Send on the part of the sales representative
13. If in step 5 you have selected Templates* : None, you must copy your HTML code. Click on the HTML button in the menu bar.
14. Copy the HTML code that is displayed.
15. Click Update. Your email will appear in the display window.

16. Click Save.
Once your new email is created, or if you have chosen an email template, you can edit the text, images, colors and the links of the email, as desired (see article Email (edit HTML, text image, link) ).
Archive (delete) an email
1. Select the desired email under Content, Email.
...
The screen below will appear.
3. Click Yes.
Go to the previous versions (drafts) of the stored emails via the Save button
...
The popup window Work not saved will be displayed as xxxxx (explain when this popup appears (when closing the email without previously saving it?)
Click See the versions.
The Versions screen below is displayed.
2 - Test if a user Version is automatically created when you save an email
1. Save the email (if a Mailing address window opens, Click continue).
2. You will be redirected in the list.
3. Open the email again.
4. Click Previous Versions (at the top below the sender address).
5. Make sure you see the User version in the Versions window.
6. Close the pop-up.
3 - Test the recovery of a version
1. Click on Previous Versions (at the top below the sender address).
2. Click on one of the previous versions of an email.
3. Make sure that the previous version of the email is retrieved (the change that you made to the email be displayed????).
4 - Test the deletion of a version
1. Click on Previous Versions (at the top below the sender address).
2. Click the "x" next to a version
3. Close the Versions window and click again on Previous Versions. Make sure that the deleted version is no longer displayed.
TIPS
- PUBLITRAC supports standard (desktop) or mobile format emails (our technology supports the "media queries" enabling optimal emails on mobile. However, these emails on mobile must be configured at the programming level because PUBLITRAC does not transform a standard email into a mobile version).
- Text format emails are no longer necessary because the existing email customers (Outlook, Gmail, Hotmail, Apple Mail, Yahoo, Lotus, Thunderbird,...) can all read emails in HTML format (an HTML format allows an layout (tables, images, links, etc.)).
- Non-centered images in Outlook.Outlook does not support the margin properties often used in HTML to center objects. As a result, your images may align to the left for your emails viewed by Outlook even if you ask for your images to be centered. Therefore, you must modify the HTML code so that Outlook can support the centering your image feature. The solution is the following: add the tags < center > < /center > or < p style = "text-align: center;" > < /p > around the image of your HTML code. For example: < center > < img src = "http://www.publipage.com/image.jpg" > < /center > or < p style = "text-align: center;" > < img src = "http://www.publipage.com/image.jpg" > < /p
...